A Comprehensive Guide to Cricut Printable Vinyl Setting


Understanding Cricut Printable Vinyl
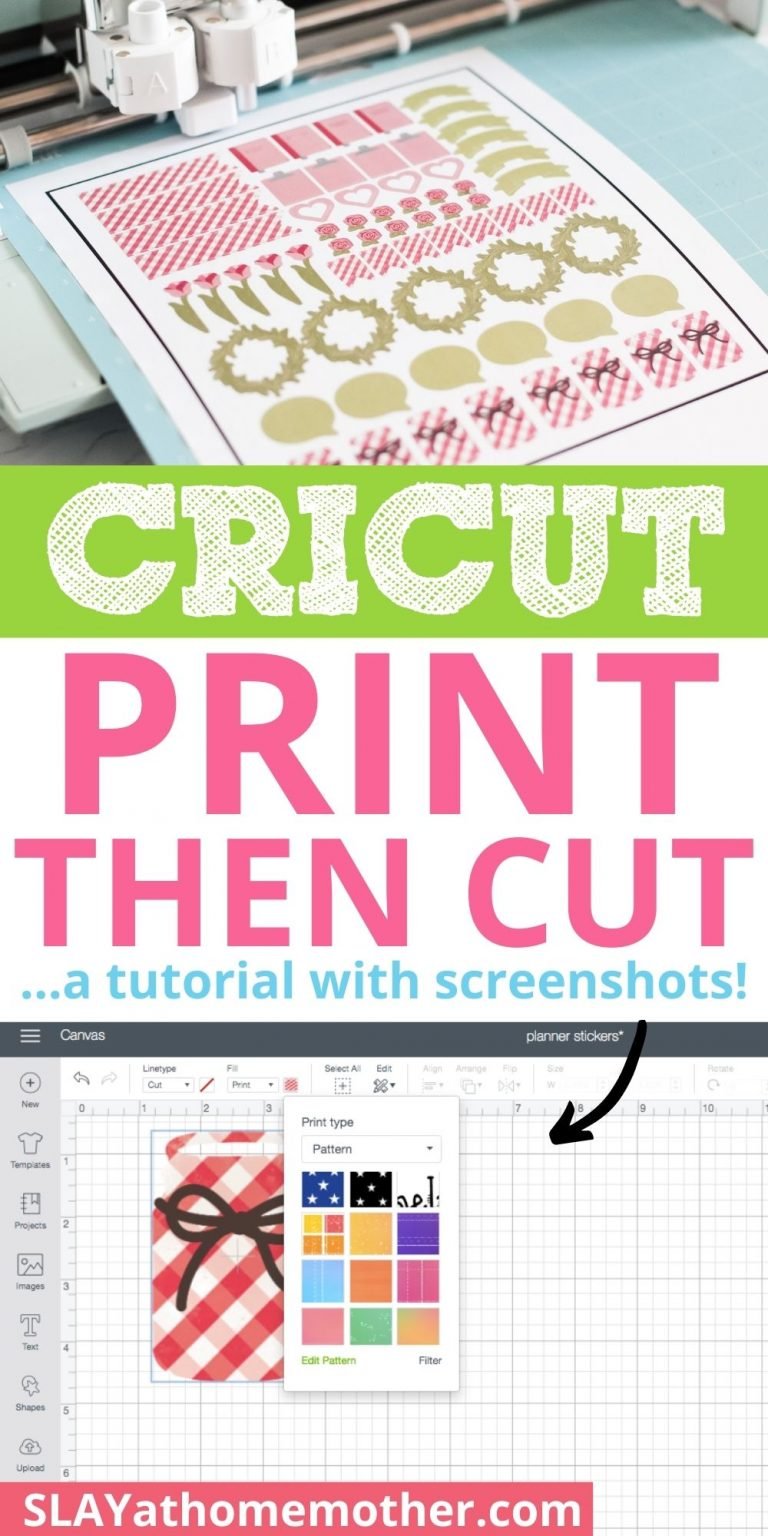
If you're a crafty person, you're probably familiar with the Cricut machine and its endless possibilities. One of the most popular materials to use with a Cricut is printable vinyl, which allows you to create custom designs and projects with ease. However, getting the setting just right can be a bit tricky, which is why we've put together this guide to help you master the Cricut printable vinyl setting.
The first step to using printable vinyl with your Cricut is to understand the different types of vinyl available. There are several varieties, including iron-on, adhesive, and printable vinyl. Each type has its own unique characteristics and uses, so it's essential to choose the right one for your project. For example, iron-on vinyl is perfect for custom t-shirts and tote bags, while adhesive vinyl is better suited for signs and decals.
Tips for Achieving the Perfect Cut
When it comes to printable vinyl, the Cricut machine offers a range of settings to help you achieve the perfect cut. The most important thing to keep in mind is the type of vinyl you're using and the desired finish. For example, if you're using a glossy vinyl, you may need to adjust the blade depth and pressure to prevent scratching or tearing. On the other hand, if you're using a matte vinyl, you may need to increase the blade depth to ensure a clean cut.
To get the most out of your Cricut printable vinyl setting, it's essential to follow a few simple tips and tricks. First, make sure to mirror your image before cutting, as this will ensure that the design is reversed and will appear correctly on your project. Second, use the correct blade and housing for the type of vinyl you're using. Finally, experiment with different settings and techniques to find what works best for you and your project. With a little practice and patience, you'll be creating stunning custom designs and projects in no time.