How to Create an Organizational Chart in Excel
Understanding the Basics of Organizational Charts
Creating an organizational chart is an essential step in understanding and visualizing the structure of your company. It helps to identify the different departments, teams, and roles within the organization, as well as the relationships between them. In this article, we will show you how to create an organizational chart in Excel, a popular spreadsheet software that is widely used in businesses.
Before you start creating your organizational chart, it's essential to understand the basics of organizational charts. An organizational chart is a visual representation of a company's structure, showing the different levels of management, departments, and teams. It's typically represented as a hierarchical chart, with the highest level of management at the top and the lower levels below.
Creating an Organizational Chart in Excel
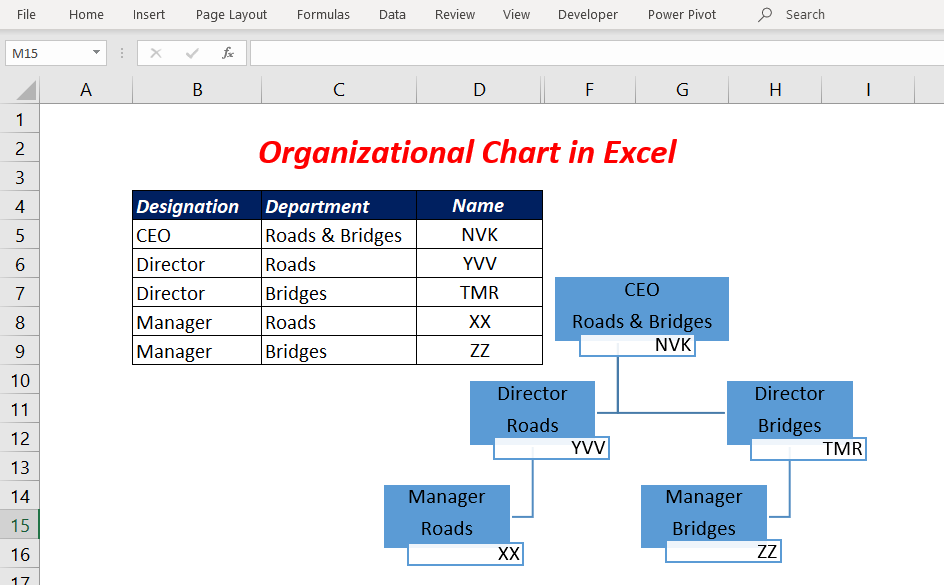
To create an organizational chart in Excel, you will need to start by gathering the necessary data. This includes the names and titles of employees, as well as their department and manager. You can use a spreadsheet to organize this data, with columns for employee name, title, department, and manager. Once you have your data organized, you can use Excel's built-in charting tools to create the organizational chart.
To create the chart, select the data range that you want to use, and then go to the 'Insert' tab in the ribbon. Click on 'SmartArt' and select the 'Hierarchy' chart type. Excel will automatically create the organizational chart based on your data. You can customize the chart as needed, adding or removing employees, departments, and teams. With these steps, you can easily create an organizational chart in Excel that helps you visualize and understand your company's structure.