Fold Your Way to Fun: Origami Airplane Printable Instructions


Getting Started with Origami Airplane Instructions
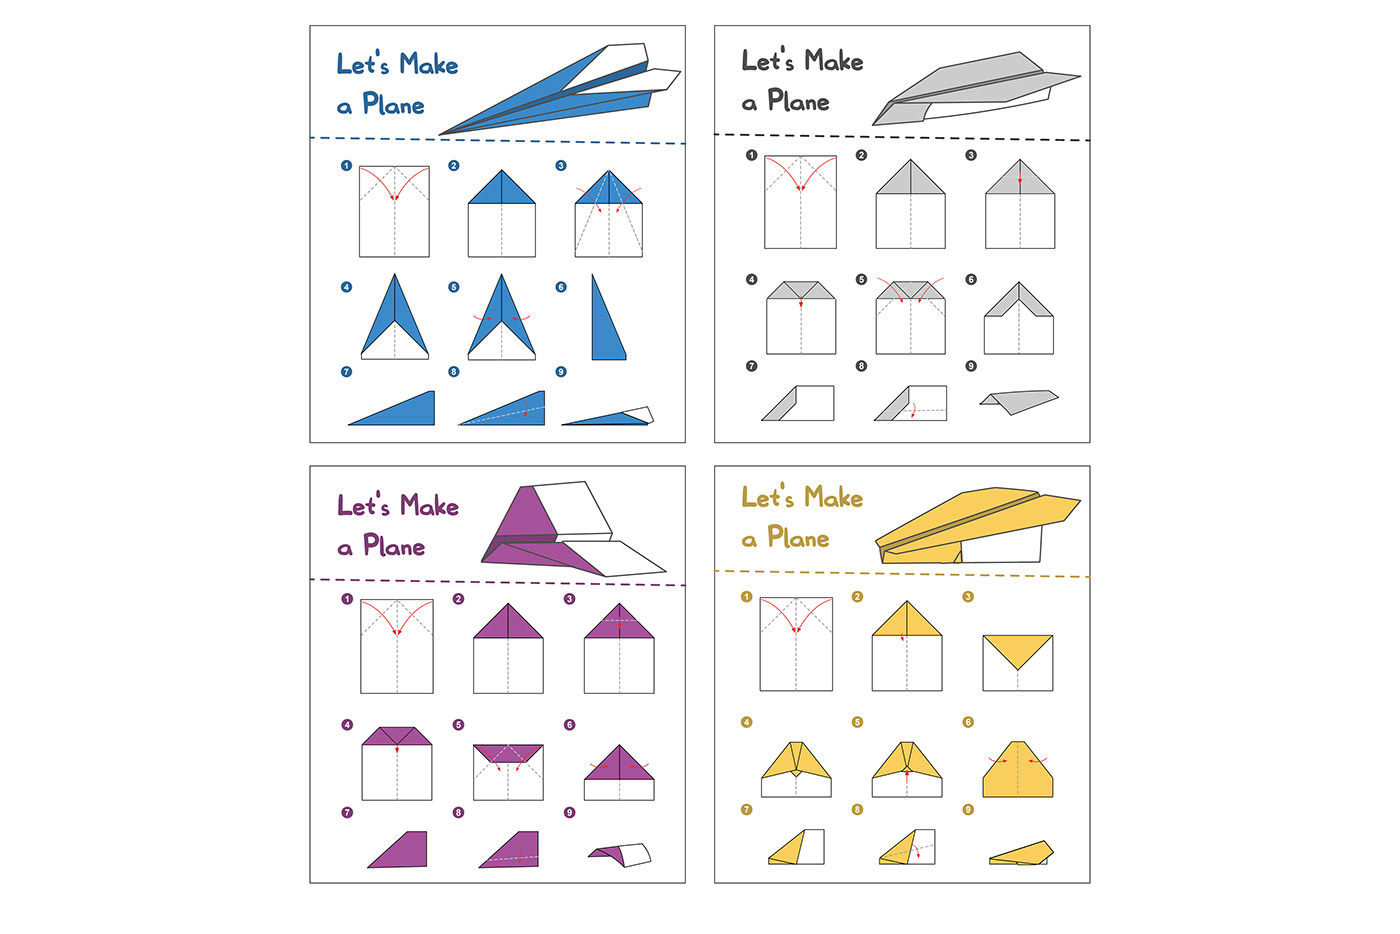
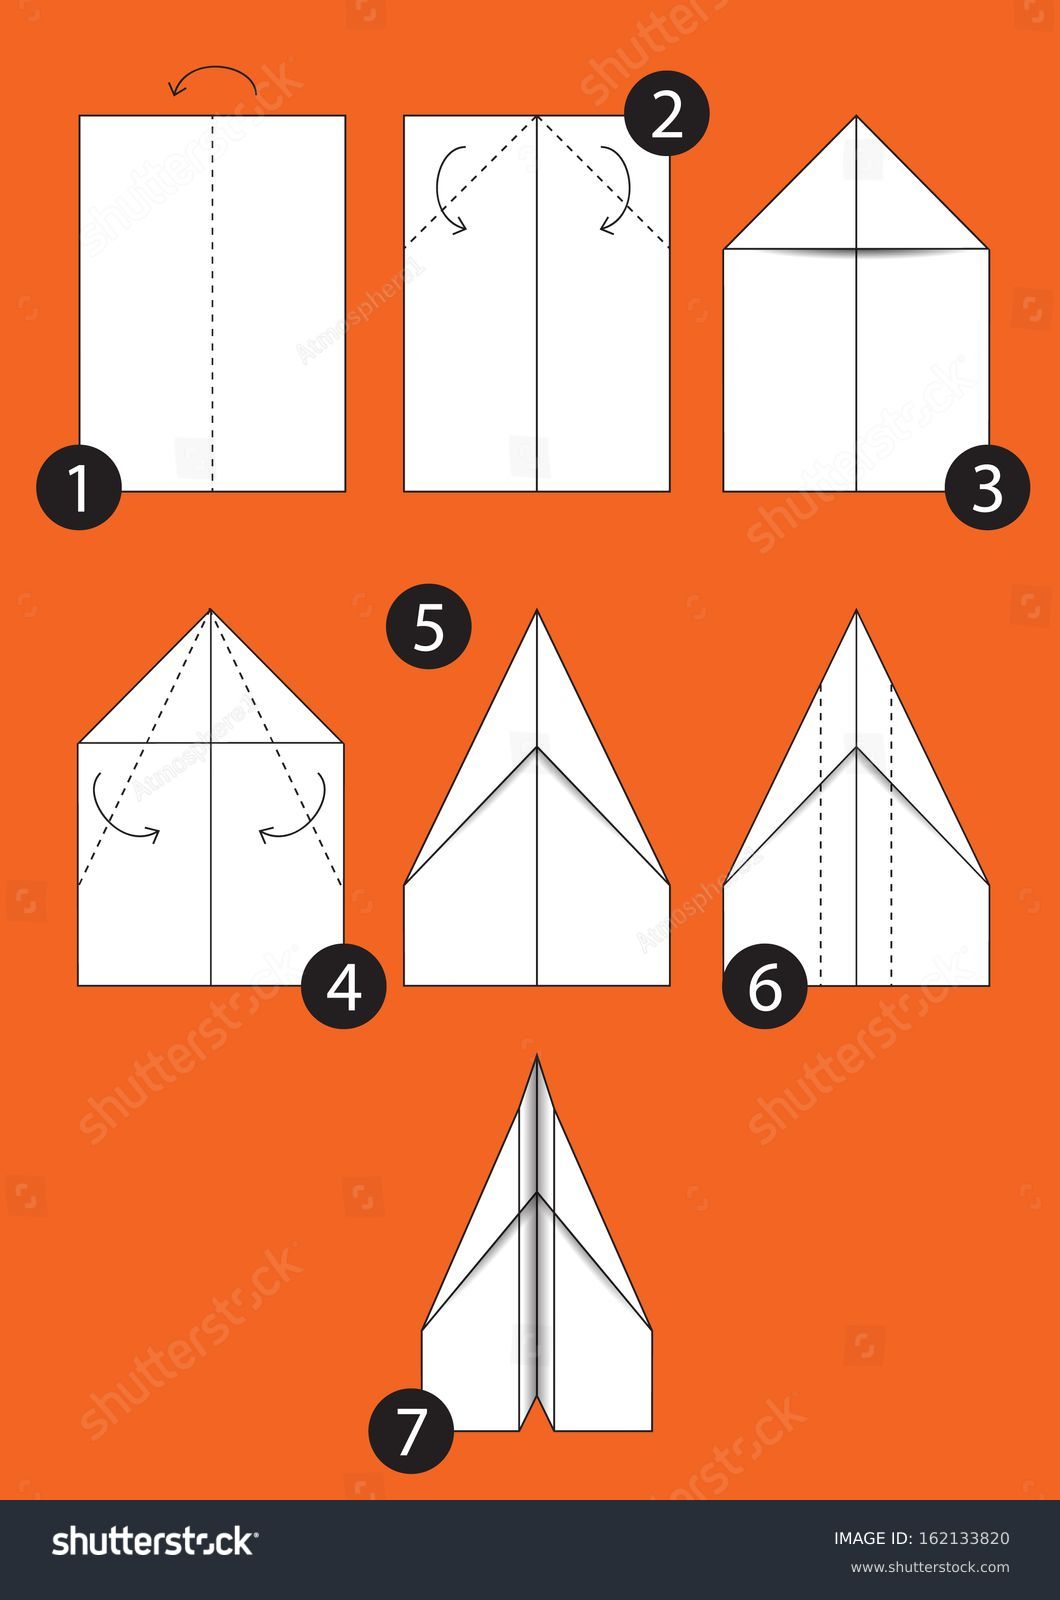
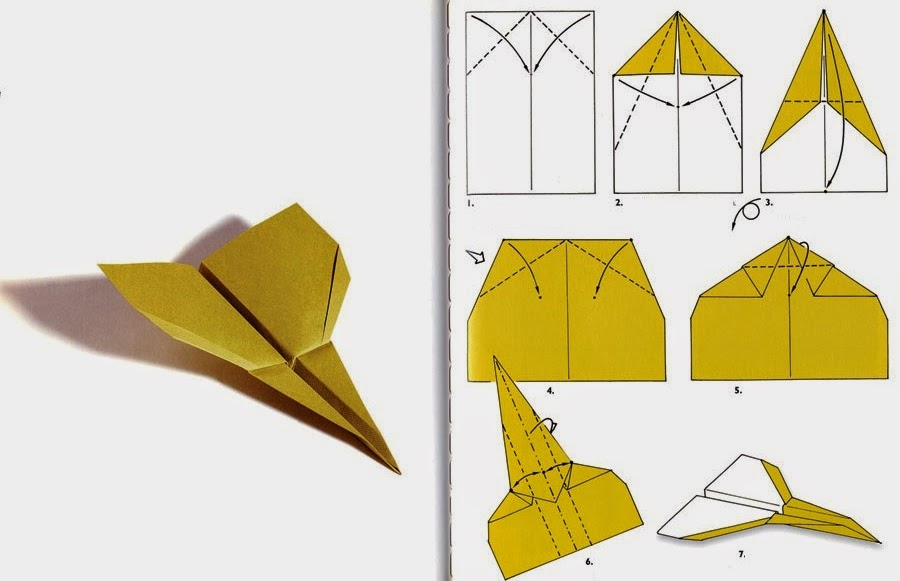
Are you looking for a fun and creative activity to do with your kids or on your own? Look no further than origami, the ancient Japanese art of paper folding. One of the most popular and iconic origami designs is the origami airplane, and with our printable instructions, you can learn how to make one in no time. Whether you're a seasoned origami enthusiast or a beginner, our step-by-step guide will walk you through the process of folding a beautiful and functional origami airplane.
The best part about origami is that it requires minimal materials - just a piece of paper and your hands. You can use any type of paper you like, from plain white to colorful patterned paper, to create a unique and personalized origami airplane. Our printable instructions include detailed diagrams and photos to help you understand each fold, making it easy to follow along and create your own origami airplane.
Tips and Variations for Your Origami Airplane
To get started, simply print out our origami airplane instructions and follow along with the steps. Begin by folding your paper in half and then opening it back up to create a crease in the middle. Next, fold the top left and right corners down to the middle crease, and then fold the bottom left and right corners up to the middle crease. Continue following the instructions, folding and creasing the paper as you go, until you have completed your origami airplane.
Once you've mastered the basic origami airplane design, you can experiment with different variations and tips to make your plane more unique. Try using different types of paper, such as metallic or glitter paper, to add some extra flair to your design. You can also adjust the size of your plane by using larger or smaller pieces of paper. With a little practice and patience, you can create a fleet of origami airplanes to enjoy and share with friends and family.