
A Guide to Printable Iron On Instructions

Getting Started with Printable Iron On
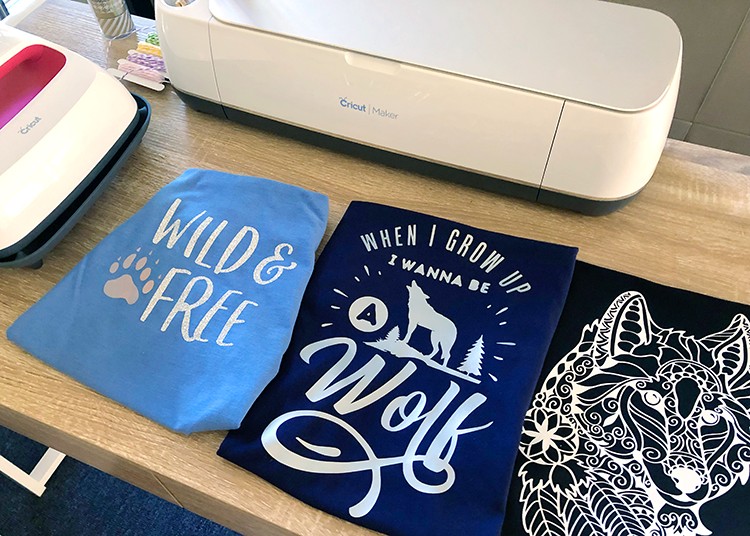
Printable iron on instructions are a great way to add a personal touch to your clothes and accessories. With the ability to create custom designs and prints, you can make unique gifts or simply add some personality to your own wardrobe. In this article, we'll take a look at how to use printable iron on instructions to get the best results.
The first step in using printable iron on instructions is to choose the right type of paper. There are several options available, including iron on transfer paper and printable vinyl. Each type of paper has its own set of instructions, so be sure to read and follow them carefully. You'll also need a printer and a computer with design software to create your custom design.
Tips and Tricks for Perfect Results
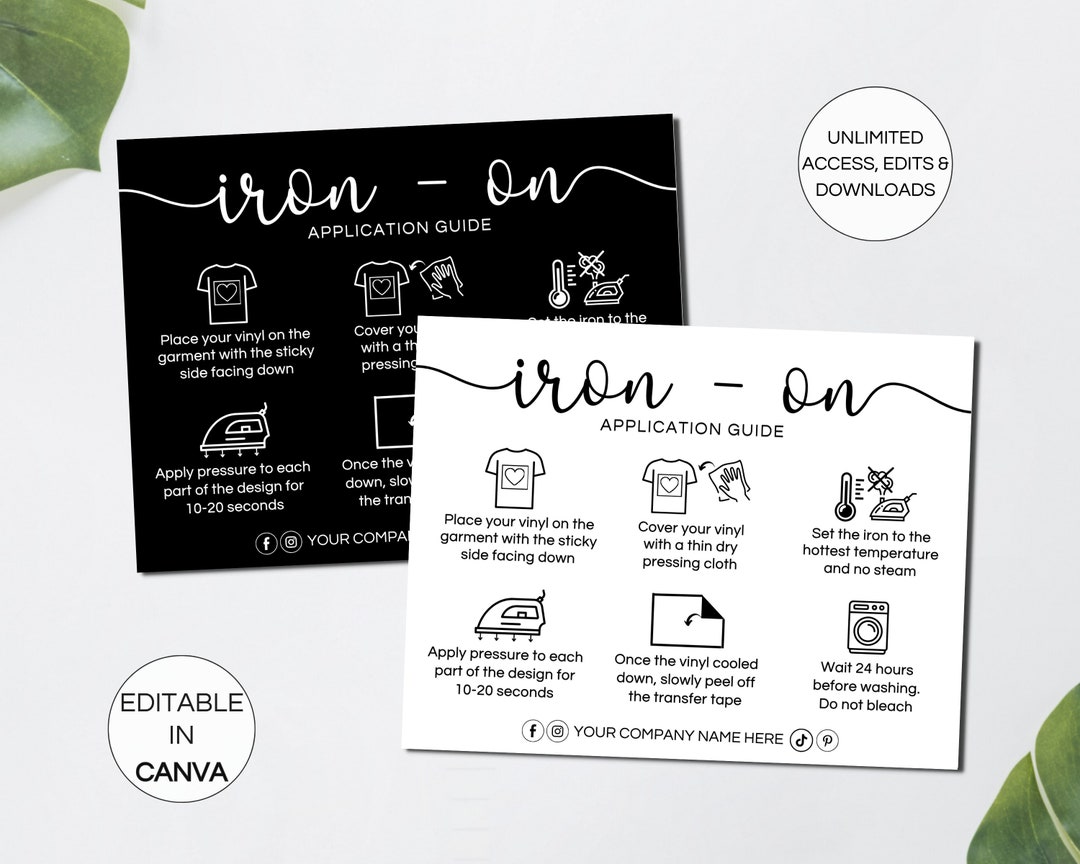
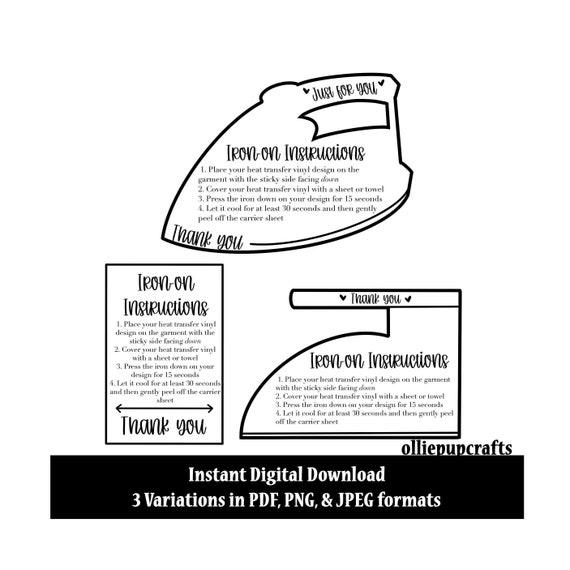
Once you have your design and paper, it's time to start printing. Make sure to mirror your image before printing, as this will ensure that it appears correctly on your final product. You'll also want to use a high-quality printer setting to get the best results. After printing, allow the ink to dry completely before moving on to the next step.
To get perfect results with printable iron on instructions, it's all about the details. Make sure to follow the instructions carefully and take your time when applying the design to your fabric. Use a hot iron and apply firm pressure to ensure that the design adheres properly. With a little practice and patience, you'll be creating custom designs like a pro. Whether you're making gifts or just want to add some personality to your wardrobe, printable iron on instructions are a great way to get creative and have fun.