
Printable Iron On Transfers: A Step-by-Step Guide


Getting Started with Printable Iron On Transfers
Printable iron on transfers are a great way to add custom designs, logos, or text to your favorite t-shirts, hoodies, and other fabrics. With the right materials and a little practice, you can create professional-looking iron on transfers at home. In this article, we'll show you how to get started with printable iron on transfers and provide you with some helpful tips and tricks along the way.
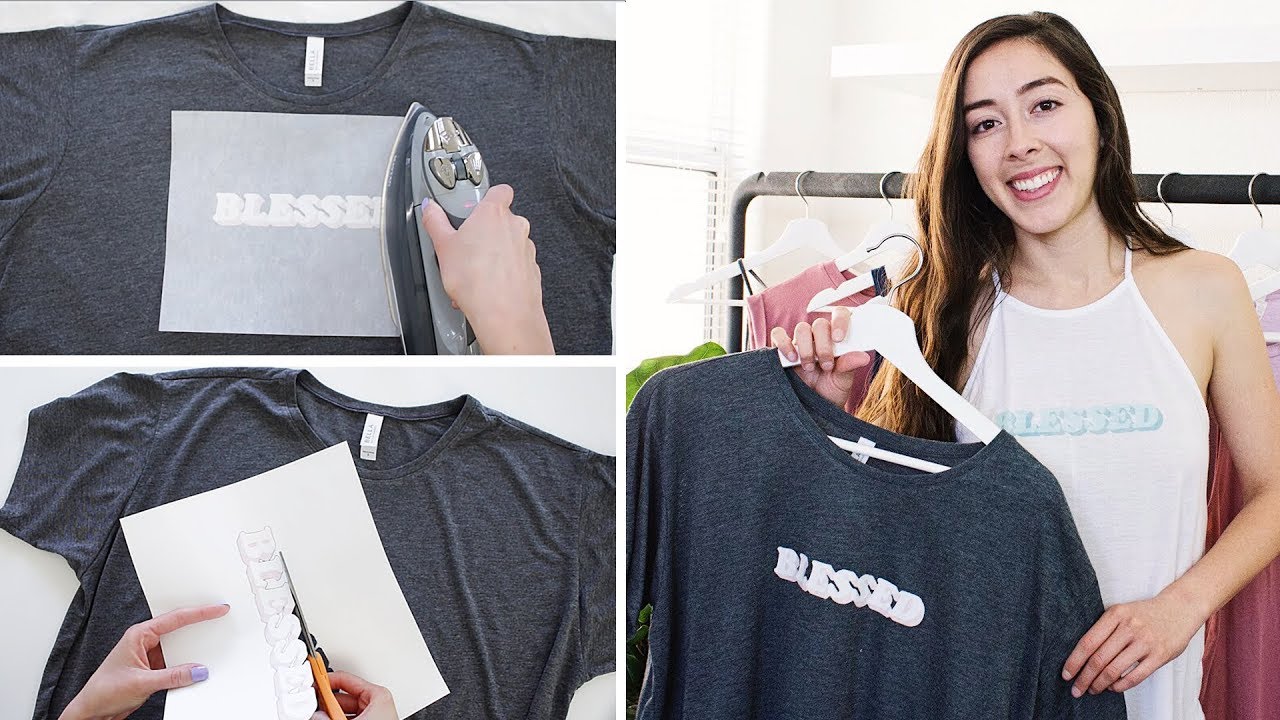
To create printable iron on transfers, you'll need a few basic supplies, including a printer, iron on transfer paper, and a computer with design software. You can use a variety of design programs, such as Adobe Illustrator or Canva, to create your custom design. Once you've designed your image, print it onto the iron on transfer paper using your printer. Make sure to mirror your image before printing, as the transfer will be reversed when applied to the fabric.
Tips and Tricks for Applying Iron On Transfers
Applying the iron on transfer to your fabric is a relatively straightforward process. Preheat your iron to a medium-high heat setting and place the transfer paper onto the fabric, image-side down. Apply gentle pressure and heat for about 10-15 seconds, then slowly peel off the transfer paper. If the image doesn't transfer completely, you can repeat the process a few times until it's fully applied. Tips and Tricks for Applying Iron On Transfers
With a little practice, you'll be creating custom printable iron on transfers like a pro. Remember to always follow the instructions on the iron on transfer paper and to test a small area of the fabric before applying the transfer. This will ensure that the transfer adheres properly and doesn't damage the fabric. By following these simple steps and tips, you can create custom iron on transfers for all your favorite fabrics and add a personal touch to your clothing and accessories.