
Origami Corner Bookmark Printable Instructions
Getting Started with Origami Corner Bookmarks
If you're a book lover, you know how important it is to keep your place while reading. One creative way to do this is with an origami corner bookmark. Not only are they functional, but they can also be a beautiful addition to your book. In this article, we'll provide you with printable instructions on how to create your own origami corner bookmark.
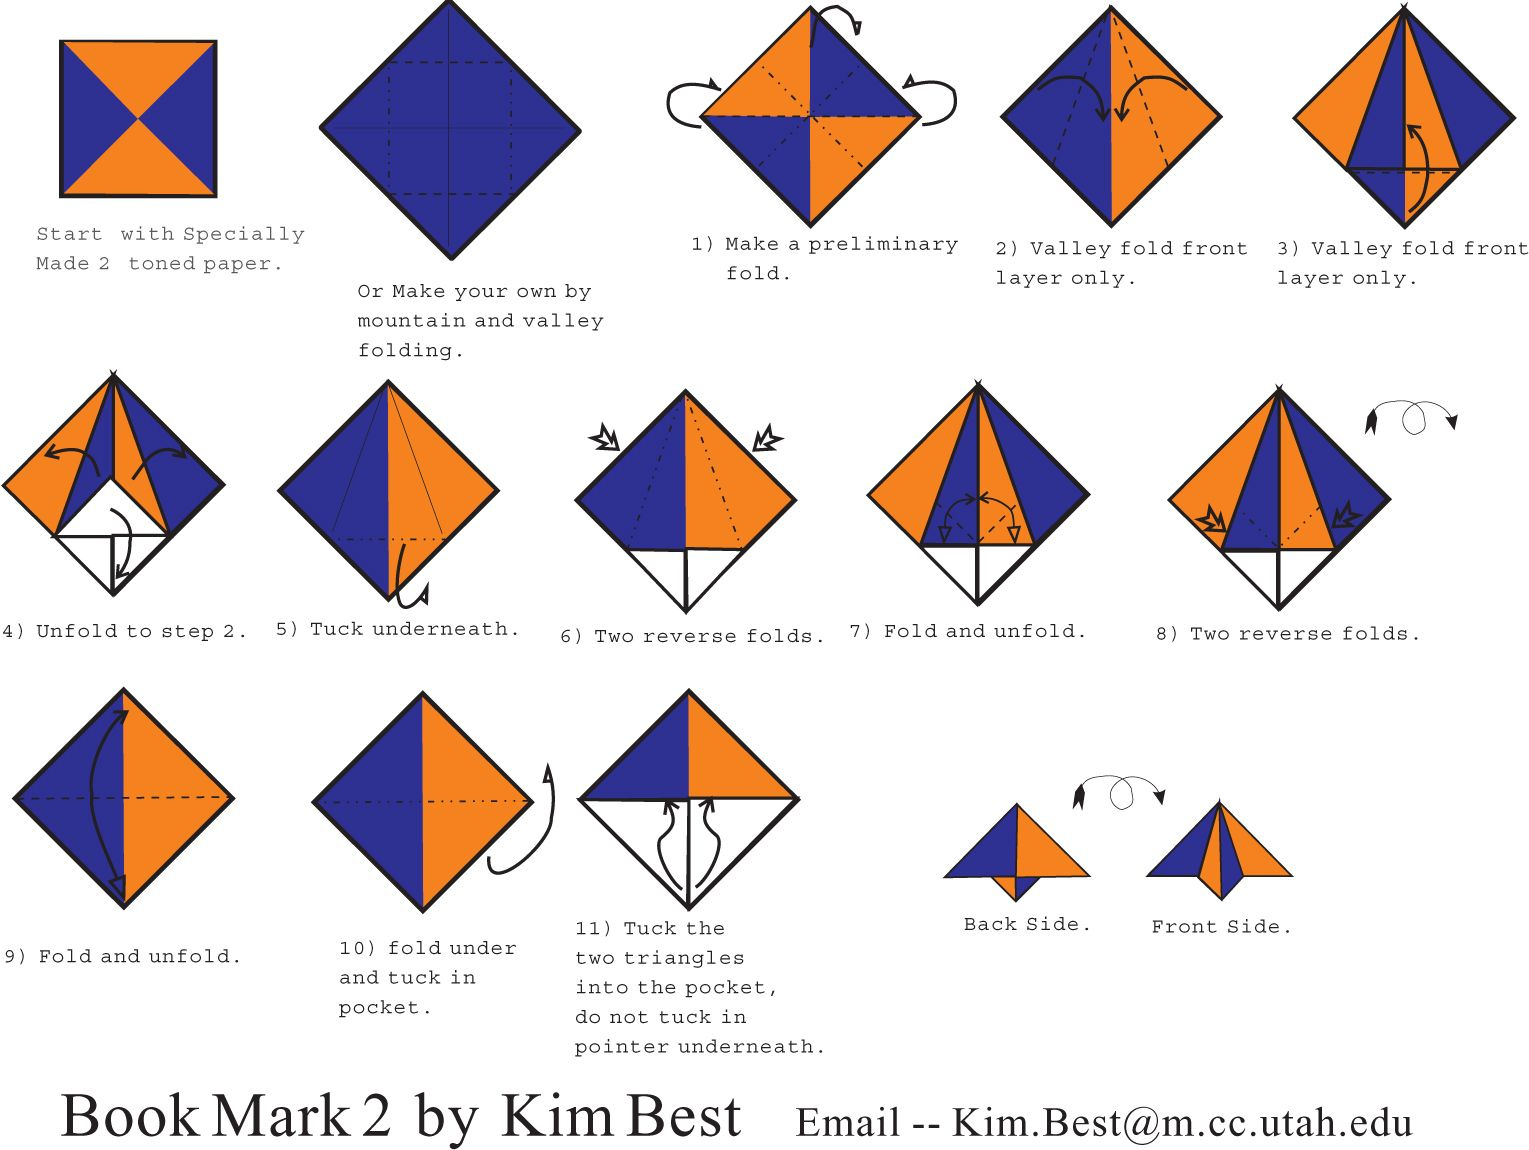
To get started, you'll need a square piece of paper. You can use any type of paper you like, but it's best to use a paper that is at least 6 inches by 6 inches. You'll also need a pencil and a ruler. Begin by folding the paper in half diagonally to create a triangle. Then, open the paper back up and fold it in half the other way, creating another diagonal triangle.
Tips and Variations for Your Origami Corner Bookmarks
Now it's time to start creating the bookmark itself. Fold the top right and left corners of the paper down so that they meet at the middle crease. Next, fold the bottom right and left corners up so that they meet at the middle crease. You should start to see the bookmark take shape. Continue folding the paper in this way, making sure to crease each fold sharply with your finger or a bone folder.
Once you've completed your origami corner bookmark, you can customize it to fit your personal style. You can add a tassel or a bead to the end of the bookmark, or decorate it with markers or stamps. You can also experiment with different types of paper and folding techniques to create unique and intricate designs. With these printable instructions, you'll be able to create your own beautiful origami corner bookmarks in no time.